

Introduction
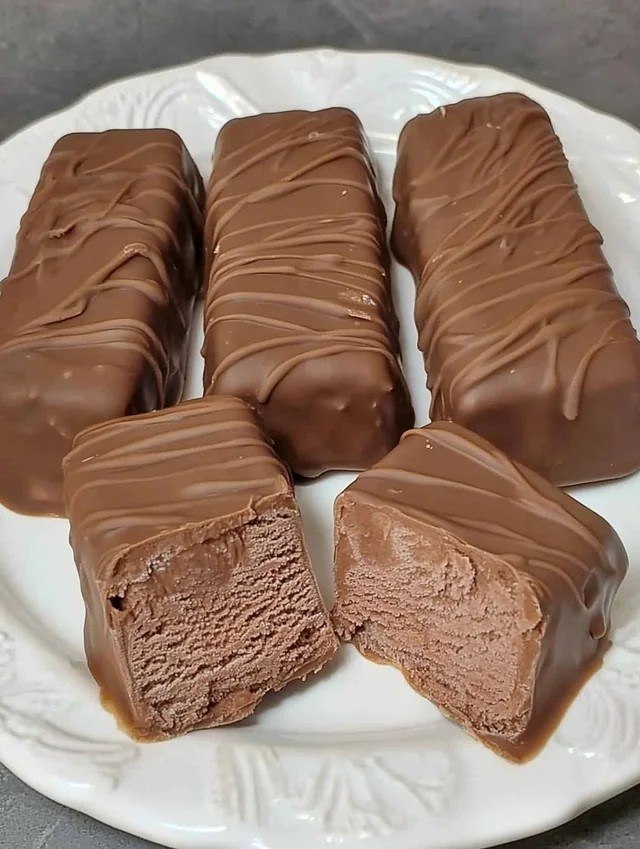
There’s something universally satisfying about biting into a chocolate-covered wafer ice cream bar. The contrast of textures — a crisp chocolate shell, a creamy ice cream core, and the subtle crunch of wafer layers — creates a dessert experience that delights all senses. Whether you’re reminiscing about childhood treats or seeking a new favorite frozen snack, these bars are an irresistible combination of flavor and nostalgia.
In this comprehensive guide, we’ll explore everything you need to know about chocolate-covered wafer ice cream bars: how to make them from scratch, tips for achieving the perfect texture, variations for every taste, and even storage suggestions. Whether you’re a home cook or a food blogger looking for trending dessert content, this article is your go-to resource.
What Are Chocolate-Covered Wafer Ice Cream Bars?
A Fusion of Crunch, Cream, and Chocolate
Chocolate-covered wafer ice cream bars are frozen desserts made by layering ice cream and crispy wafers, then coating the assembled bar in rich, melted chocolate. They often mimic commercial favorites like Kit Kat Ice Cream or Kinder Bueno-style treats, but homemade versions allow for customization and better quality control.
Key Components
- Ice Cream – Typically vanilla, chocolate, or hazelnut.
- Wafer Layers – Light, crunchy layers that provide texture.
- Chocolate Coating – Milk, dark, or white chocolate for a rich outer shell.
Why They’re So Popular
Trending on Social Media
According to recent Google Trends data, searches for “ice cream wafer bars” and “homemade chocolate ice cream bars” have increased significantly, especially during summer months. On TikTok and Instagram, videos featuring DIY ice cream bars routinely gather millions of views, thanks to their visual appeal and satisfying texture.
Perfect for Every Occasion
- Summer Treats: Cool and refreshing.
- Dessert Tables: Eye-catching and elegant.
- Kids’ Parties: A healthier alternative to store-bought treats.
- Holiday Gifts: Customizable and easy to wrap.
How to Make Chocolate-Covered Wafer Ice Cream Bars
Ingredients
To make about 6–8 bars:
- 1 pint of chocolate or vanilla ice cream (softened slightly)
- 12 rectangular wafer biscuits (chocolate or plain)
- 2 cups of milk chocolate chips or couverture chocolate
- 2 tsp coconut oil or butter (for smoother melting)
- Optional: chopped nuts, sprinkles, caramel sauce for filling
Step-by-Step Instructions
Step 1: Prepare the Wafer Layers
- Line a baking tray with parchment paper.
- Place 6 wafers on the tray as a base.
- Scoop about 2–3 tablespoons of softened ice cream onto each.
- Gently press another wafer on top to sandwich the ice cream.
- Freeze for at least 1–2 hours until firm.
Step 2: Melt the Chocolate
- Use a double boiler or microwave-safe bowl.
- Melt the chocolate chips with coconut oil, stirring until smooth.
- Allow it to cool slightly so it doesn’t melt the ice cream upon contact.
Step 3: Dip and Set
- Remove frozen bars from the freezer.
- Dip each sandwich in the melted chocolate using tongs or a fork.
- Place on parchment-lined tray and return to freezer for 15–30 minutes.
Step 4: Serve or Store
- Serve immediately or store in an airtight container for up to 1 month.
Tips for Success
- Use Quality Chocolate: Couverture or high-percentage cocoa chocolate melts better and tastes richer.
- Chill the Tools: Keep tools and trays chilled to prevent melting during dipping.
- Don’t Overfill: Too much ice cream can cause the wafers to break or ooze when dipped.
Flavor Variations to Try
Ice Cream Options
- Mint Chocolate Chip
- Strawberry Swirl
- Peanut Butter Banana
- Espresso Gelato
Chocolate Coating Varieties
- Dark Chocolate + Sea Salt
- White Chocolate + Matcha
- Milk Chocolate + Crushed Hazelnuts
Toppings & Mix-ins
- Toasted Coconut
- Mini Marshmallows
- Caramel Drizzle
- Freeze-dried Berries
Healthier Alternatives
Looking to make a guilt-free version of chocolate-covered wafer ice cream bars? Here are a few swaps:
- Low-Sugar Ice Cream: Use keto or dairy-free options.
- Dark Chocolate: Opt for 70% cocoa or higher for less sugar.
- Whole Grain Wafers: Available in many organic food stores.
- Natural Sweeteners: Choose honey-sweetened chocolate or sugar-free alternatives.
Fun Serving Ideas
- Bar Tower: Stack bars in a pyramid for dessert buffets.
- Mini Bites: Cut bars into bite-size chunks before coating in chocolate.
- DIY Bar Station: Let guests dip and decorate their own.
FAQs
How long do chocolate-covered wafer ice cream bars last in the freezer?
Up to 1 month in an airtight container. Wrap each bar in wax paper to prevent freezer burn.
Can I use store-bought wafers and ice cream?
Absolutely! Store-bought items make the process faster and just as delicious.
Can I make these bars vegan?
Yes. Use dairy-free ice cream, vegan chocolate, and check that your wafers contain no animal products.
Nutritional Snapshot (Per Standard Bar)
| Nutrient | Amount |
|---|---|
| Calories | 210–260 |
| Carbs | 25–30g |
| Protein | 2–4g |
| Sugar | 18–22g |
| Fat | 12–15g |
Note: Values vary depending on specific ingredients used.
SEO Keywords Used
Primary Keyword:
- Chocolate-covered wafer ice cream bars
Secondary Keywords:
- Ice cream wafer bars
- Homemade chocolate ice cream bars
- Frozen chocolate dessert
- Wafer ice cream sandwich
- Chocolate-coated ice cream treat
Conclusion: Treat Yourself to a DIY Frozen Delight
Chocolate-covered wafer ice cream bars are more than just a sweet treat — they’re a delightful blend of crunch, creaminess, and chocolatey indulgence. With minimal ingredients and endless flavor possibilities, these bars are perfect for everything from everyday snacks to special celebrations.
Ready to make your own? Share your creations on social media and tag your favorite recipe source — or better yet, bookmark this page for your next dessert adventure!
Enjoyed this recipe or have a variation you love? Leave a comment below or subscribe for more frozen dessert ideas every week!